Uploading images to Siteglide

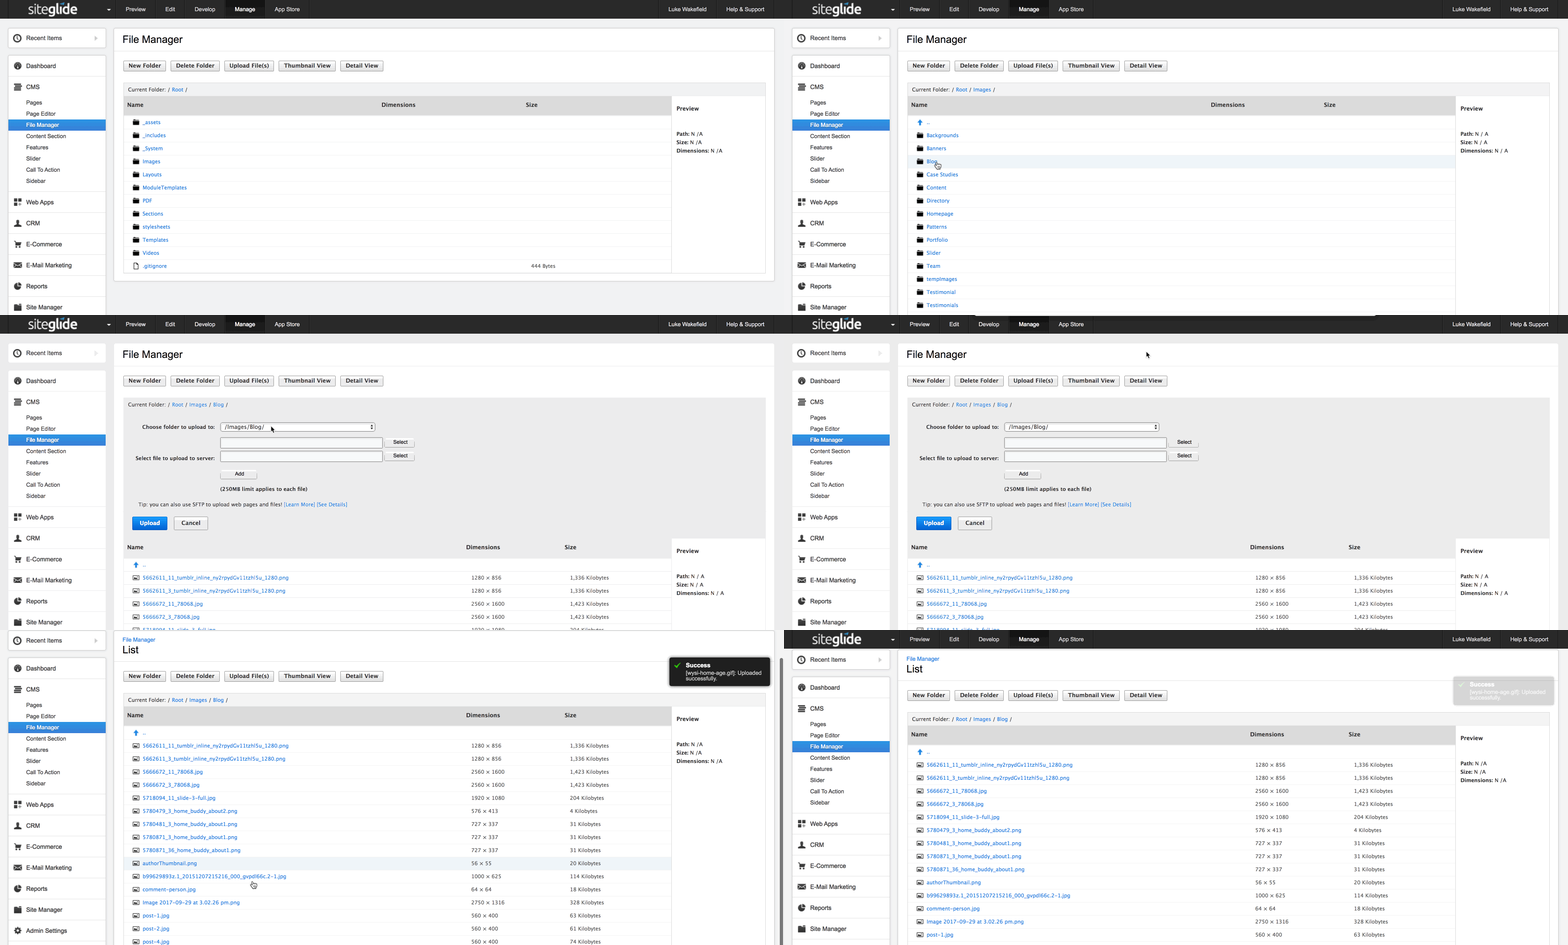
The File Manager area of Siteglide is where you upload and organise images. Just click CMS on the left hand menu and then File Manager.
Once in File Manager click the Images folder, then the folder you want to upload to and then the grey Upload File(s) button above.
You will see it's already picked that folder as the upload location.
Then click Select to pick a file to upload and it opens your local folders, either Explorer in Windows or Finder on a Mac.
Find the file you want to upload and once selected click the blue Upload button. It will then appear in the list of images. If you click it you can then get the URL but it's normally easier to insert images from the specific place you're editing from, say a blog post or service WebApp item.
If you have any questions on this guide just let us know.


