Tips & Tricks of Asana - Part 1

Many of our clients use Asana to contact us with support requests. We use Asana as it is far easier for everyone to keep track of tasks and progress, rather than having to fish through old email threads to remember who's doing what! If you are new to Asana, I'll be outlining some tips here for you to get started more easily.
Creating a task:
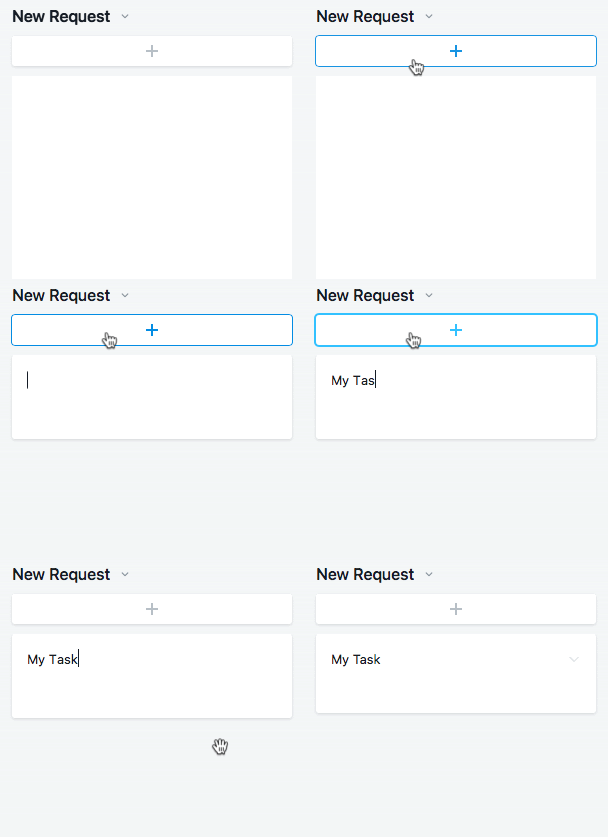
You can create a task by clicking on the “+” button at the top of “New Request” column on your board, then enter the name of the task you would like to discuss.

Adding detail to a task:
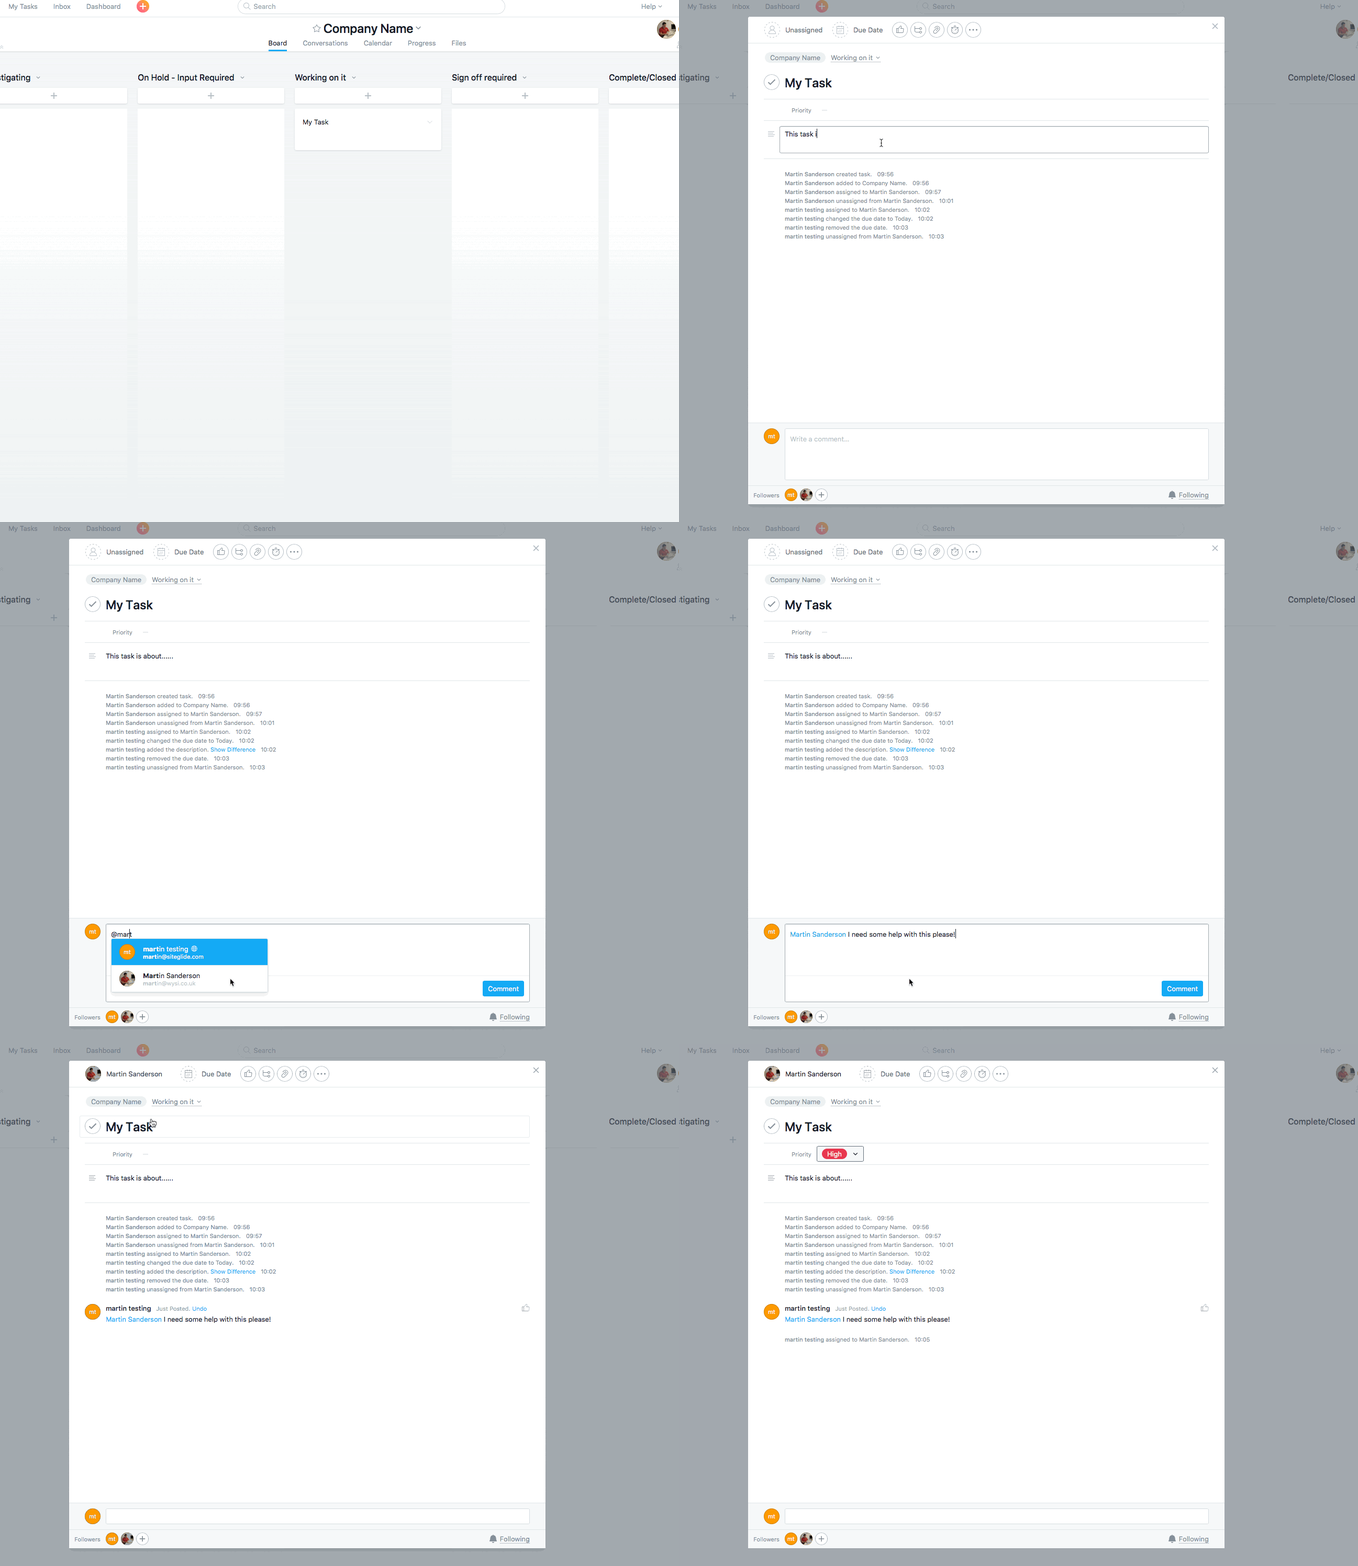
You can add various pieces of information to a task that will help our support team assist you. To begin adding information, simply click on a task to expand the view. From here you can add a description, by clicking on the “description” field.
Be sure to “tag” your primary support contact; you can do this by writing a comment at the bottom of the task, and typing “@name of support member”. Tagging them ensures that they will see your task in a more timely manner.

Attaching files to a task:
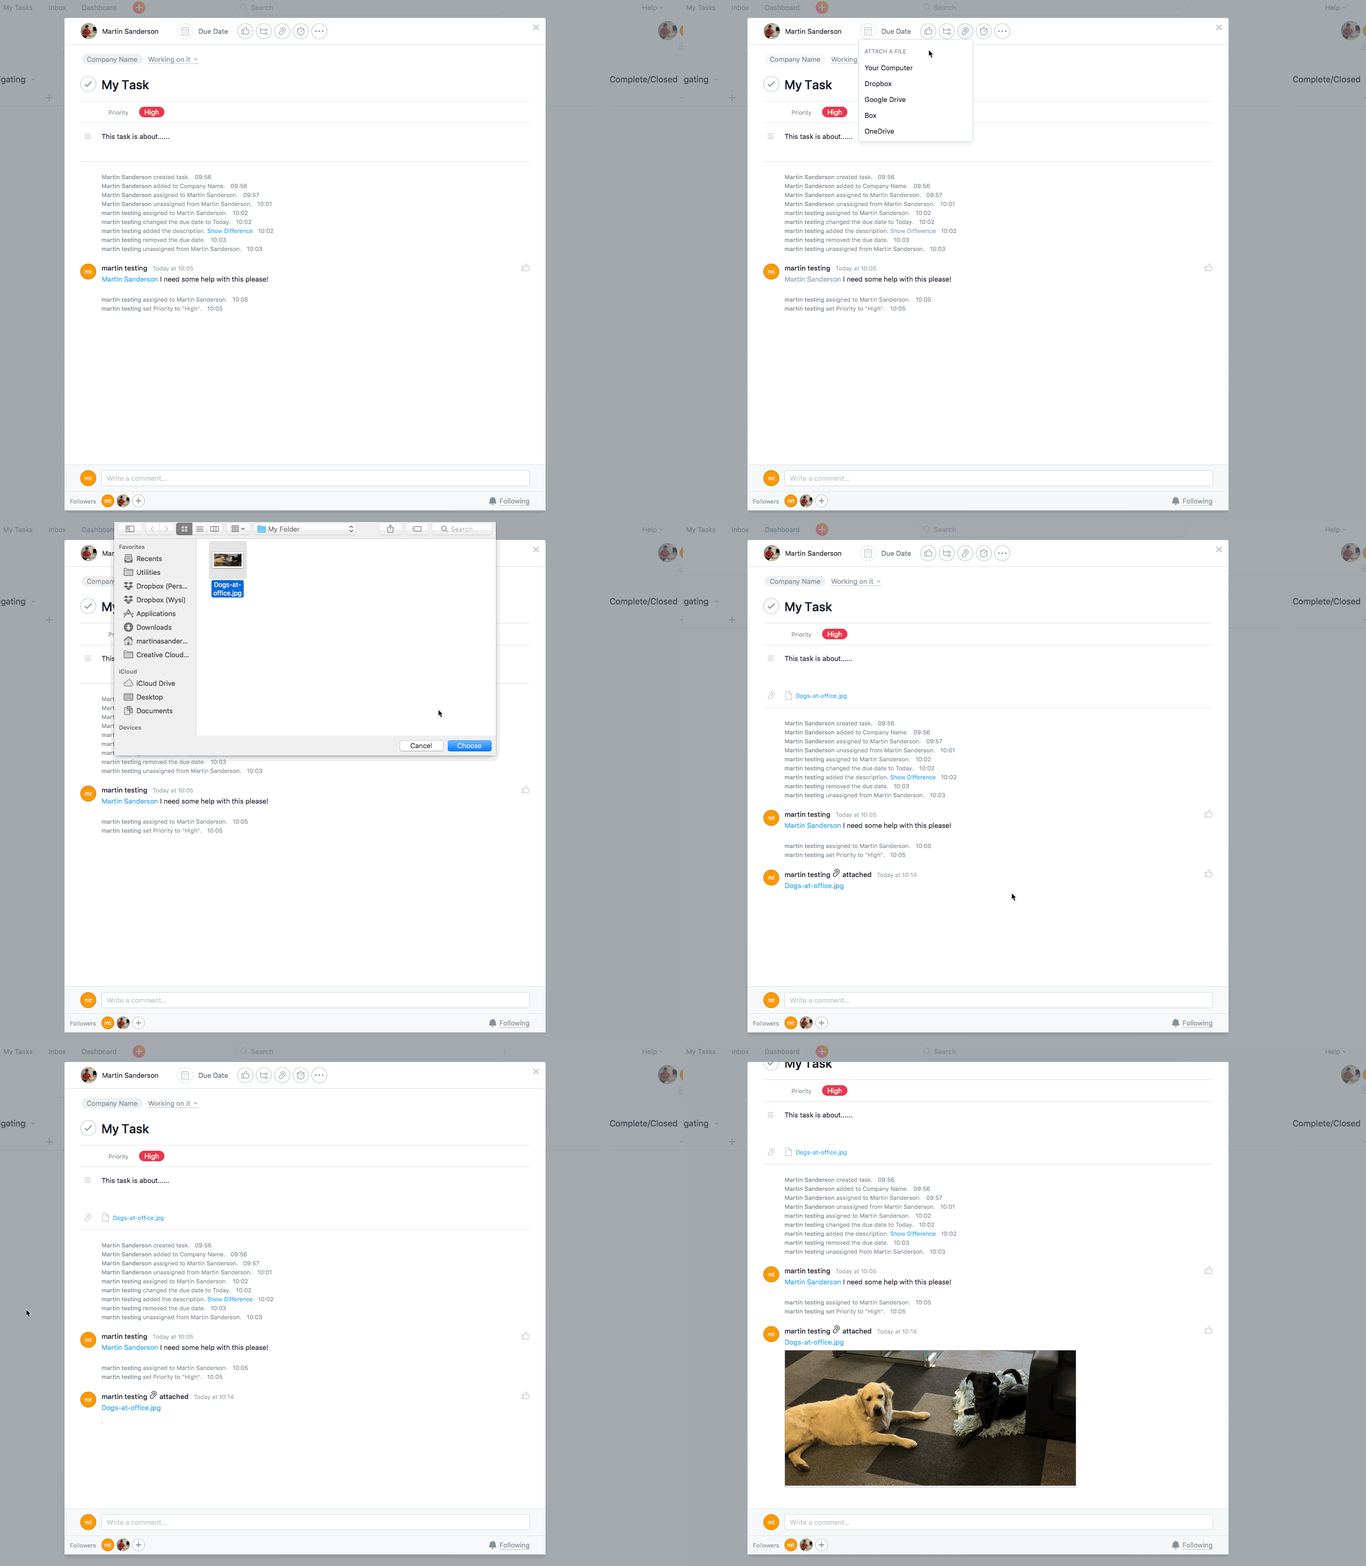
You can attach any relevant files to the task, either by dragging and dropping the file into it, or by clicking the paperclip symbol at the top of the task, and selecting your file.

If you have any other questions, let us know!

